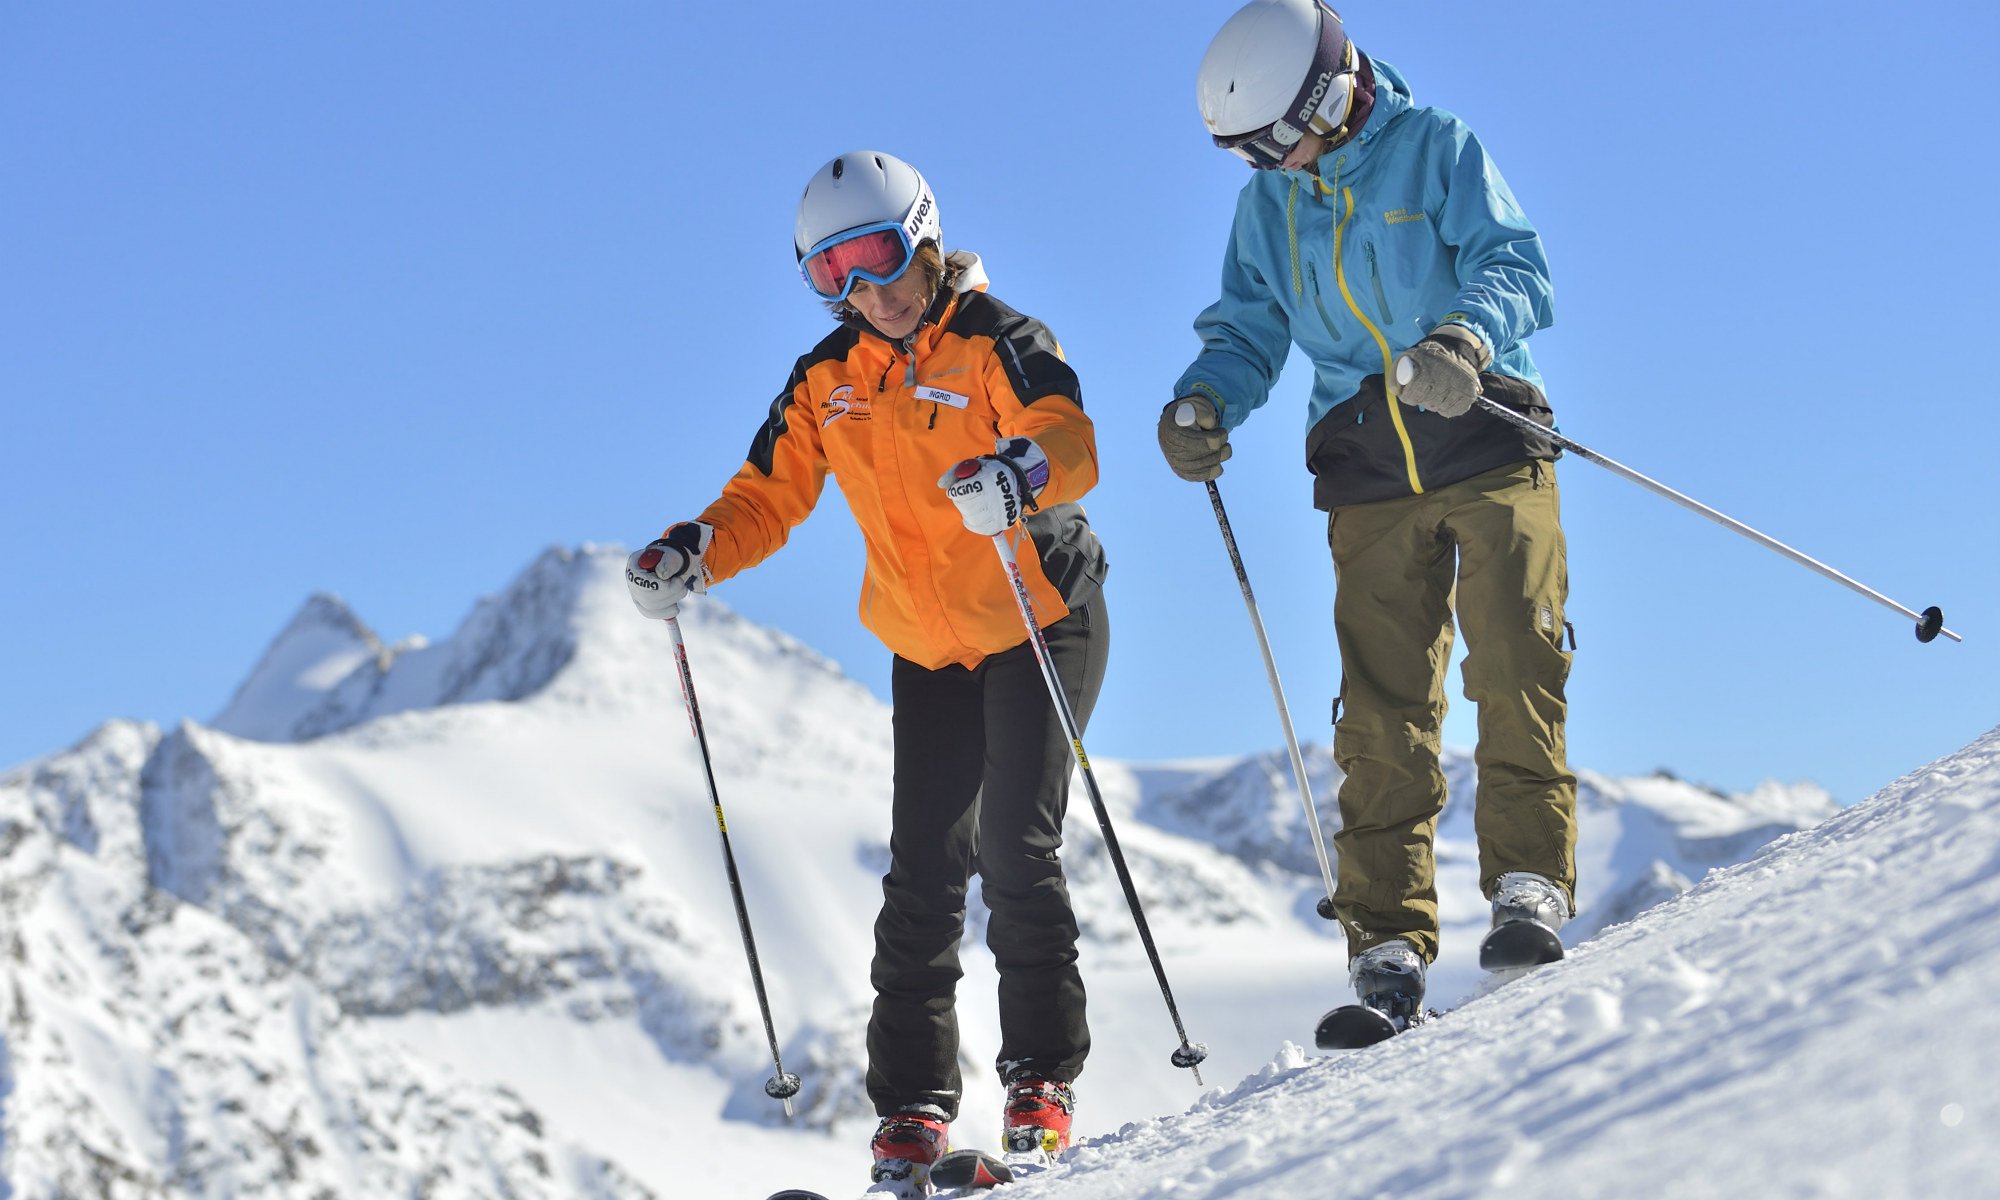
You want to fly across sparkling white slopes and enjoy the surroundings of spectacular winter landscapes? No problem – anyone can learn to ski, no matter whether you’re a child or an adult. Thanks to the latest skiing technology and experienced ski instructors, even beginners can glide down the piste within a couple of days.
To make your first experiences with Europe’s best-loved winter sport as seamless as possible, we at checkyeti have put together the most important tips and exercises for ski beginners:
-
- Equipment: How do I get into my ski boots?
- Warming up & stretching: The A to Z of preparing for a day on the slopes
- The first moves: Gliding, snow plough and curves
- First time on the ski lift: Helpful tips
Equipment: How do I get into my ski boots?
Comfortable ski boots are particularly important to ensure that the first experiences on the slope are both successful and fun. The following tips will help you choose the right boots.
Firstly, it’s recommended to try out and wear ski boots for at least 20 minutes before buying or renting. Ideally, walk around and do knee bends & crouches to ensure that the boots really are a good fit.Also, it’s important to put on the boots in the warmth of your chalet or hotel and before you go to the ski course or onto the slope. Being warm, the boots will still be soft, flexible and easier to put on. Additionally, they will fit better to your feet.
- During breaks or whilst on the ski lift, the boots can be slightly loosened but should not be removed as the cold stiffens them and they won’t be as comfortable or flexible.
-
Well-fitting equipment can make or break the first moves on the piste - Having now found comfortable boots and being out on the slope, the next step is to fasten on the skis. Securing skis on slippery snow and on a slope can be a challenge for beginners and sometimes also for experienced skiers. The following tips will help:
Checklist: Fastening on skis step by step
- Check that the boot soles are clean and free of snow
- Place the skis parallel to the slope (the stoppers face downwards to stop the skis from slipping)
- Stand next to the lower ski – the ski that is positioned closer to the valley – and push the ski boot, toe first, into the binding.
- Slowly press the heel downwards until the binding has clicked into place and is securely fastened onto the boot.
- Repeat with the second foot; using ski poles or someone giving a helping hand can help the skier stay stable & balanced.
Warming up and stretching: The A to Z of preparing for a day on the slopes
Before heading out to the slopes, it is recommended to warm up for at least 10 minutes. Skiing is a highly active sport and being out on the slopes for several hours can be very strenuous. A good warming-up session beforehand raises the body temperature and increases blood circulation. As a result, the joints and limbs are optimally supplied with nutrients and the risk of injury is reduced.
Watch an experienced ski instructor demonstrating warm-up exercises before skiing:
A thorough warm-up
✅ checkyeti Tip: The following exercises can be practised in ski boots, with or without skis. It’s recommended to continue the exercises for at least a minute, for optimum effect.
Knee-bend variants are recommended to activate the thigh muscles. Start with the “classic” knee bend and follow up with single leg knee-bends or knee “waves”, practising the typical skiing posture from bent knees to the straightened body position.
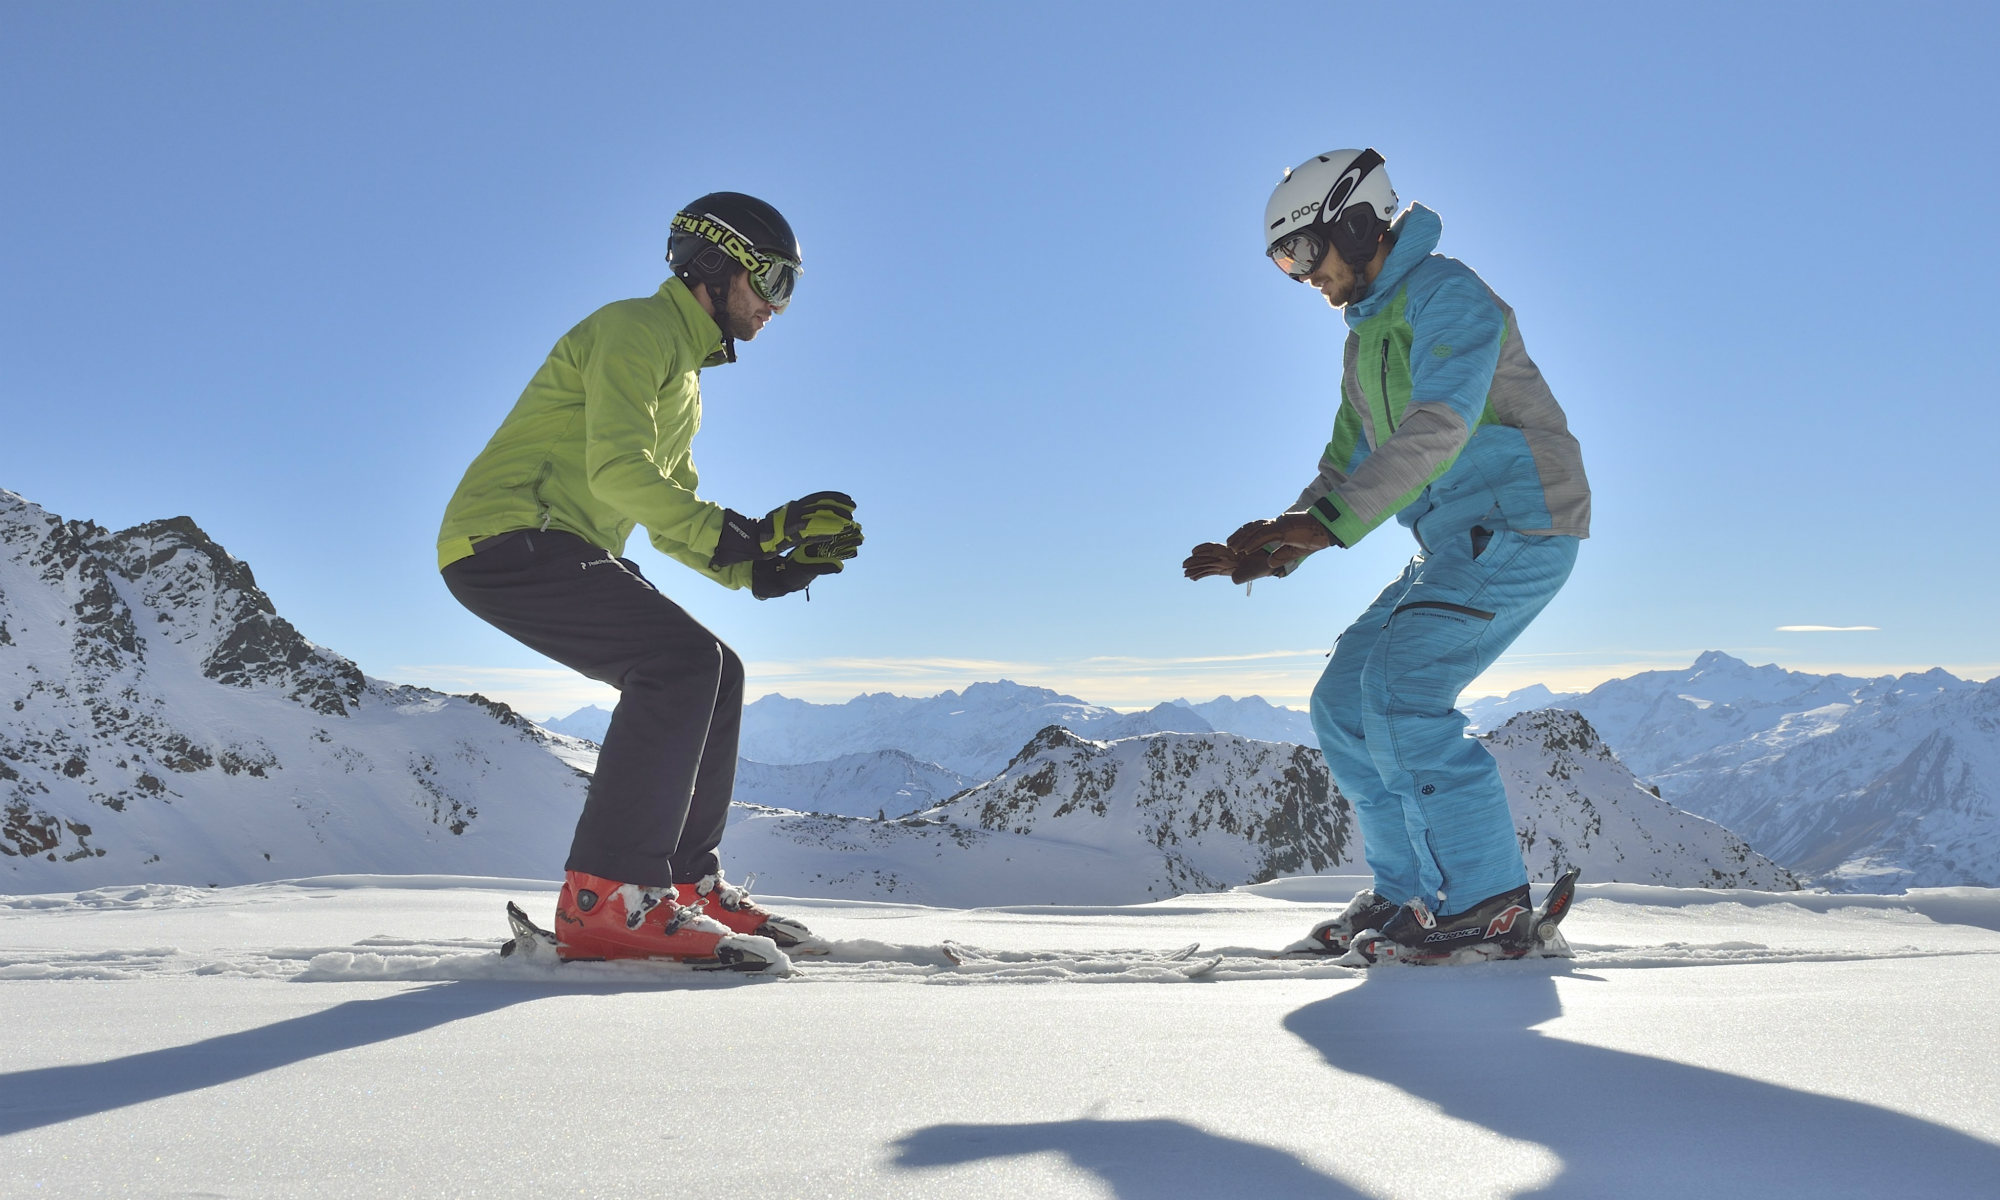
A good warm-up before skiing reduces the risk of injury - Arm circles are particularly effective for warming up the upper body. Here, the arms and shoulders are moved in circular motions, alternating smaller circles with large circles and rotating both forwards and backwards. First-time skiers should be aware that skiing uses other muscle groups than are usually used in everyday life. Therefore, it is recommended to work on stamina and muscle strength before the skiing trip. Here you’ll find short and simple exercises for optimal skiing preparation.
Well-prepared muscles
After the body has been warmed up, the next priority is to prepare the most important muscle groups to ensure flexibility and mobility on the slopes. Comprehensive stretching before setting off on skis can enhance personal skiing style but also helps prevent falls.
To optimally stretch the hamstring muscles, the skier stands with the skis shoulder-width apart, maintaining balance with support from the poles. The right leg and then alternatively the left leg are lifted straight ahead, the back end of the raised ski being rested lightly in the snow and the body bending gently forwards. The position should be held for several seconds before exercising the other leg. A gentle burning feeling can be felt in the hamstring muscles.
The thigh muscles are exercised in a similar way: The leg is raised behind the back, the knee is held at a 90-degree angle and the front tip of the ski rests in the snow. A light burning feeling in the thigh muscles indicates that the skier is exercising correctly. The position is held for a few moments before releasing. Repeat several times and with both legs.
Lunge exercises are used to effectively stretch the groin and the inside leg muscles. One leg is stretched straight out to the side, the other is knee-bent downwards. A light burning sensation will be felt in the groin.
✅ checkyeti Tip: Just as important as the pre-ski exercises are the post-ski stretching exercises. A short walk in regular shoes to follow up and a warm shower can noticeably reduce the chances of suffering from aching muscles the next day.
The first moves: Glide, snow plough and curves
The skis are securely fastened and the body is thoroughly warmed-up; it’s time to have some fun on the slopes. Firstly, however, it’s important to really feel confident in the equipment. Here, short exercises such as balancing on a single ski and then the other or practising small jumps on the skis, either with one or both feet, can help boost confidence.
The next step is to learn how to glide, which is the very first move learned on the slopes. Standing on a flat area of the slope. the skis are placed parallel to one another and the skier gently pushes forward with one foot and then the other. Skiers with more confidence can try to push off with a ski or pole and slowly glide over the snow.
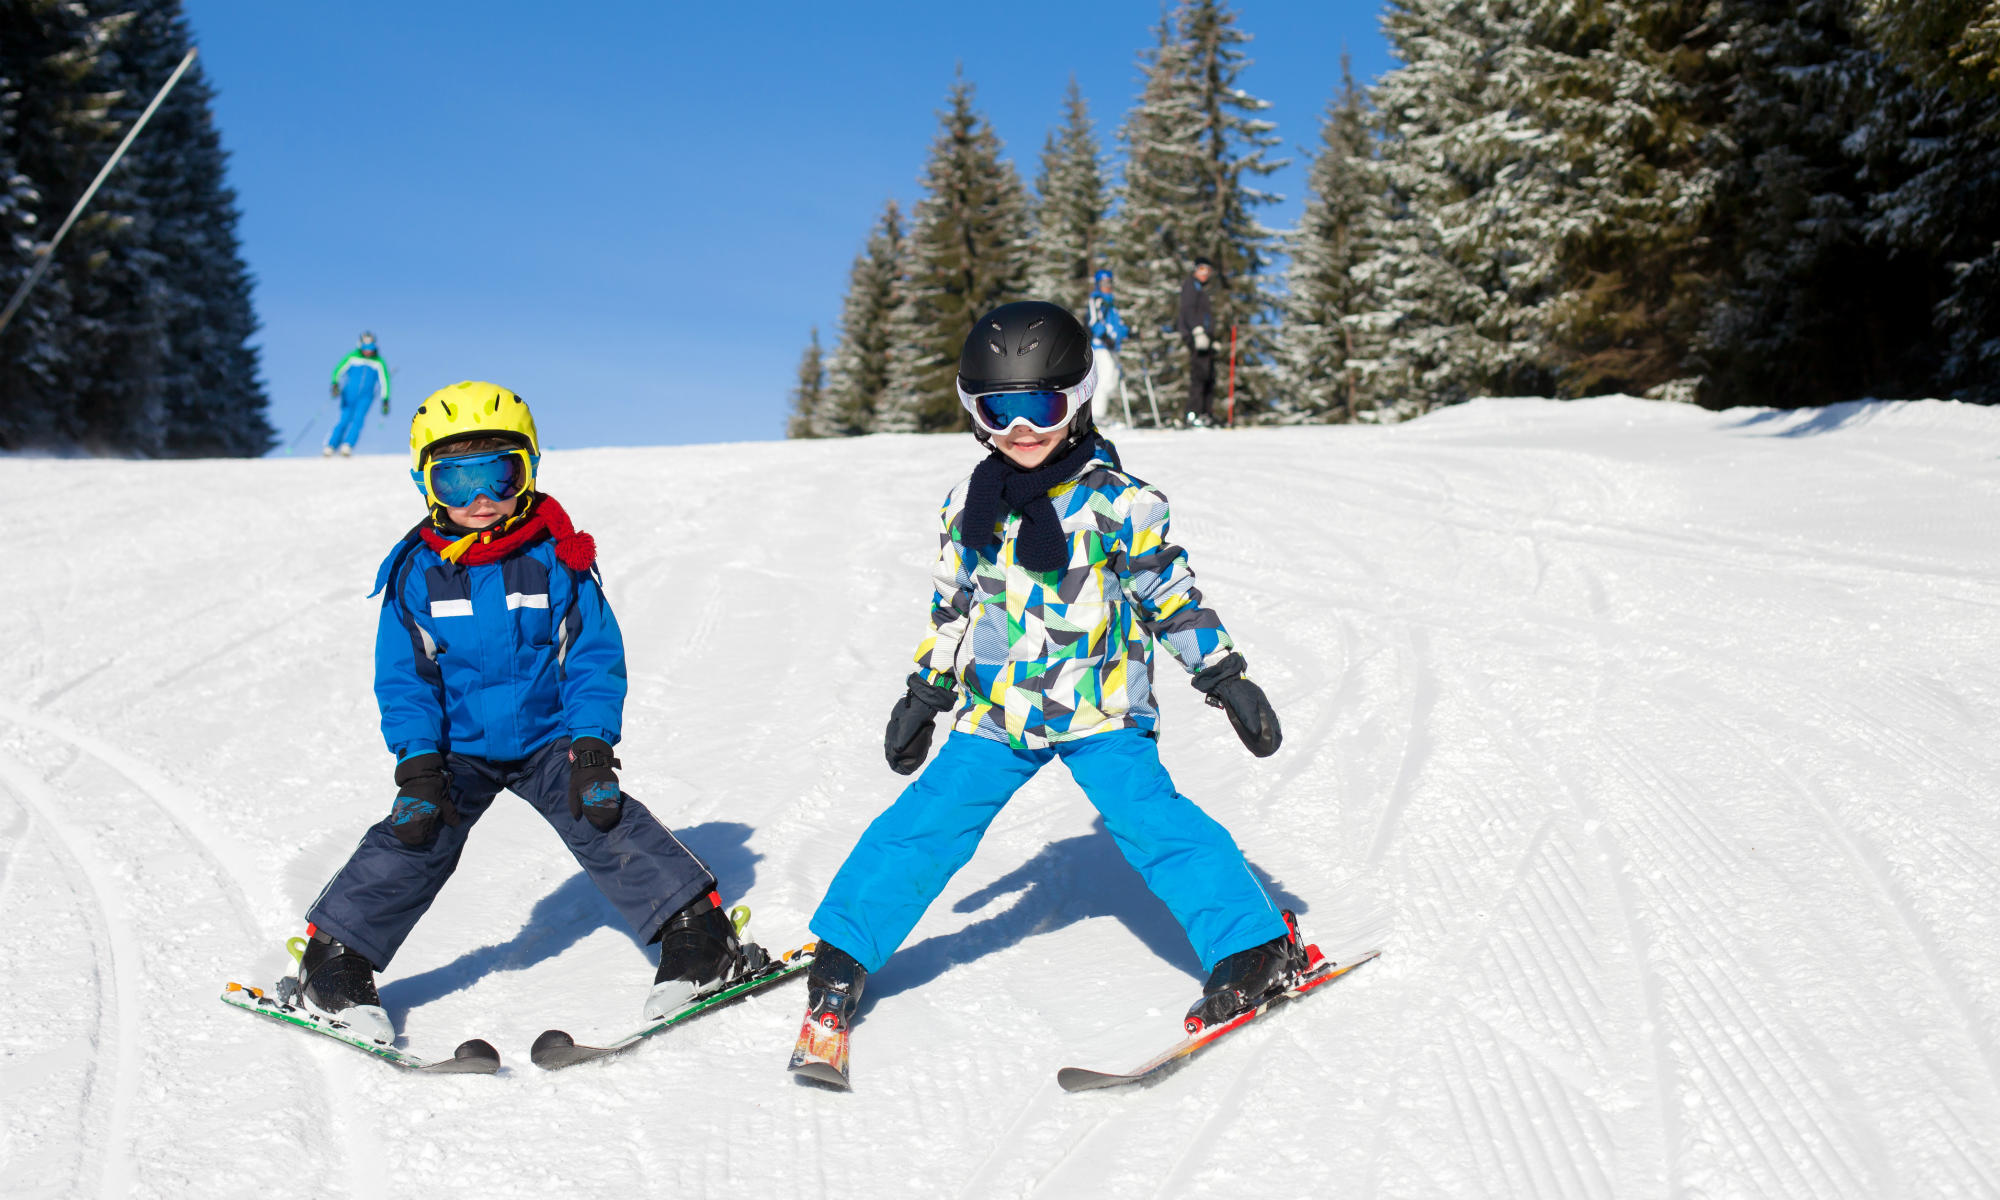
The snow plough is the best exercise for all ski beginners - The snow plough is particularly helpful for beginners. Here, the tips of the two skis are held together whilst gliding, the skis forming a “V” shape. Braking is achieved by pressing the inside edges of the skis into the snow. This creates resistance and slows the skier.In this video, ski instructor Jessy demonstrates the snow plough step by step:The first curves will be completed using the snow plough technique, however, usually without using the ski poles. To start a curve during gliding, both hands are placed on the knees and the weight is placed on the inside edge of one ski. The change in weight distribution causes the skis to begin to curve in the opposite direction.
First time on the ski lift: Helpful tips
Once the beginners’ slope has been mastered, it’s time to move onto the first “real” slope – and the first experience with the ski lift. There are various types of ski lifts, sub-divided into drag lifts and cable cars. With drag lifts, skiers remain on the snow and are pulled up the mountain on their skis. Cable cars hang in the air and are transported up the peak. Skiers sit in cabins or on a seat.
Both types of lifts can be initially overwhelming for beginners, but the following tips will help take away the fear of the first ride:
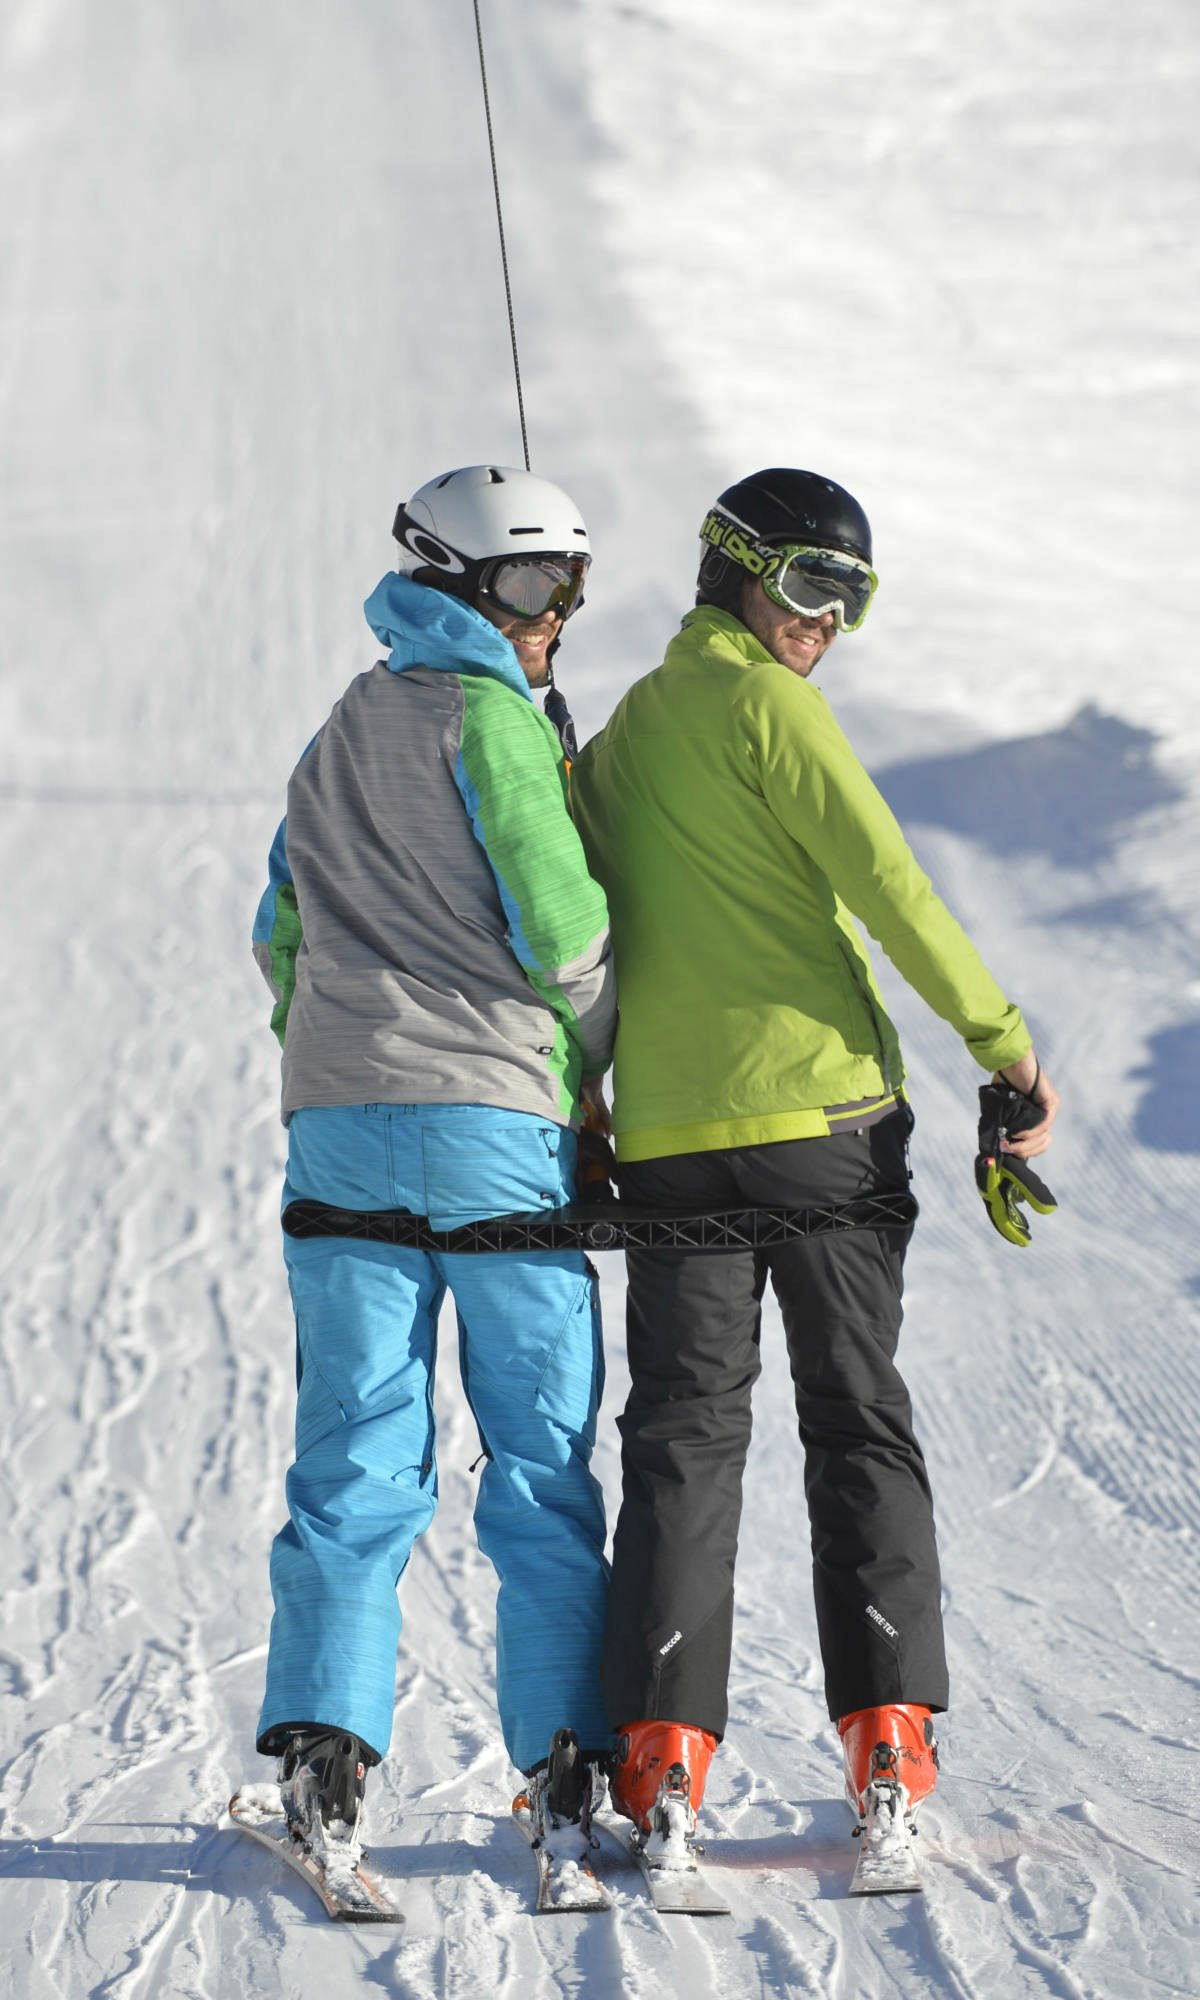
After one or two rides on a drag lift, it’s plain sailing up the slope - Drag lifts come in two forms; the button lift and the t-bar lift. Button lifts are generally used by beginners. At the entry point to a button lift, the skier must stand parallel to the lift with the ski poles hanging from their wrists. The skiers take hold of the “button” seat and quickly push it between their legs. The lift then pulls them up the slope. Having reached the top, the button is pulled out from between the legs and left to hang, and the skier moves out of the path of the lift.T-bar lifts are usually ridden in pairs and function in a similar way. Here, the skier or skiers wait parallel to the lift and grab the anchor-shaped bar, which roughly acts as a seat, supporting the skier up from behind and pulling him or her up the slope.With both lifts, it is important not to sit heavily on the button or t-bar but to gently rest against them, slightly bend the knees and be pulled up the slope. Even a fall from such a lift isn’t so much of a problem as the skier can simply move to the side and try the journey a second time!
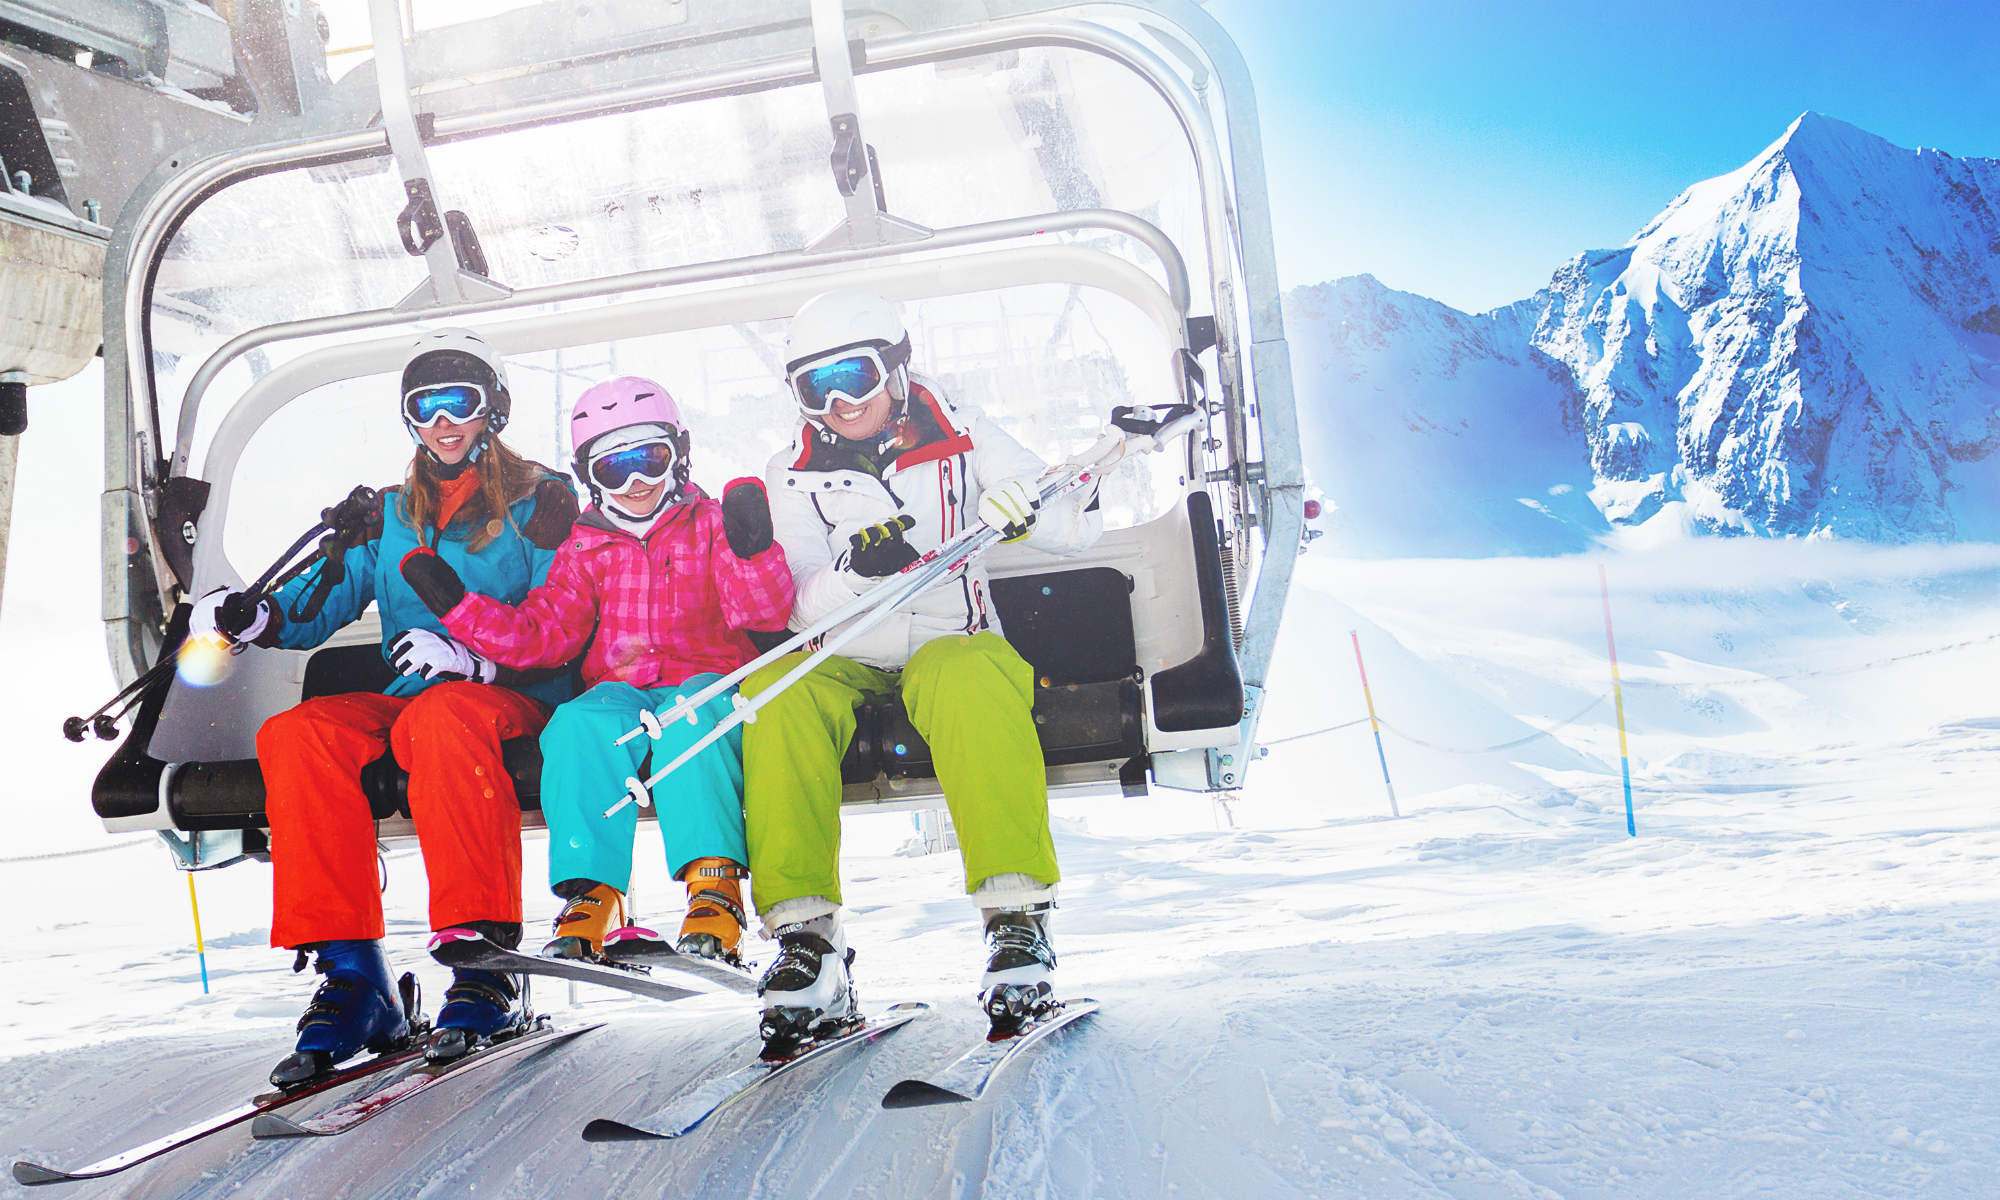
The chairlift provides a welcome break and an amazing view - The next type of lift is the chairlift, which belongs to the category of the cable car. Here, two or more skiers sit on a bench and are carried up to the next station.
A ride on the chairlift:
- A specified number of skiers wait in line, holding their ski poles in one hand.
- The chairlift approaches from behind and at the right moment, the skiers sit down.
- After seating, the safety bar is lowered and secured.
- The short journey is relaxing and offers the opportunity to enjoy the winter landscape around them.
- Shortly before arrival, the safety bar is lifted.
- At the right moment, the skiers push themselves off the bench and move to the side, out of the way of the lift.
This video shows you the easiest way to ride the ski lift:
I have always loved snow but winter in England was usually more grey than white. Now living in Austria, my kids have inherited my passion for skiing and we make most of every winter, getting out in the snow whenever we can!